E-BIKE HANDLEBAR INSTALL INTRUCTIONS
Things You Will Need
- 2,3,4mm Hex key (depending on control and switch unit)
- Torque wrench
- Spare 450mm minimum 4mm Shift housing (Guided method)
- Electrical tape (Guided method)
- pick tool (Optional for Freehand method)
- Minimum 650mm EW-SD50 wire (1st Gen EP8, E8000 & all E7000) or EW-SD300 wire (2nd Gen EP8 & E8000)
- TL-EW02 Di2 E-Tube Wiring Plug Tool (For Shimano STEPS)

Assembly time, approximately 15 minutes. Difficulty: Easy.
SPECS
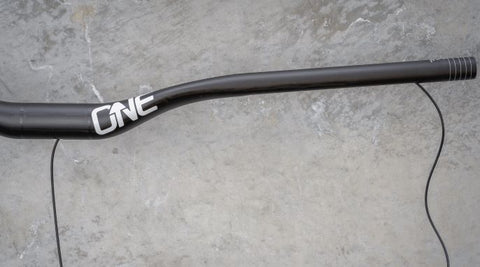
Our Carbon bars have degrees etched into the stem clamp profile. These are designed to correspond with the headangle of your bike to create a neutral (vertical) starting point for bar roll. Please keep in mind this is just a starting point, the final position should always be adjusted to your personal preference.

INSTALLATION
NOTE: These instructions are in reference to our Bar & Stem. If you are using a different stem please check the installation instructions for that stem.- You will require a stem that can accomdate a center wire port. Two piece faceplate stems are ideal.
Failing to install stem faceplates correctly can result in component failure & possible injury.
STEP 1 (FREEHAND METHOD): ROUTE WIRE
Take your EW-SD50 or EW-SD300(minimum 650mm) wire and guide it into the port at the center of the bar.

Push it slowly through the bar until it exits the end of the bar. Be sure to double check it is the same side that your switch is on. Take the end of the wire, loop it around and guide it back into the end of the bar.

Watch the port, and guide the wire end to the port. Once you can see the wire end in the port, with your fingernail, or a pick tool, guide the wire end through the port.


You can now adjust the length so that the wire can reach both your computer at the stem, and your switch by the grip. If you have excess wire, tuck it into either port as necessary.
Note: If the freehand method works for you skip the alternate step 1 below and go to step 2. If you are having difficulty with the freehand method, see the alternate step 1 below.
STEP 1 (GUIDED METHOD): ROUTE WIRE
Run your shift housing through the wire port at the center of the bar and push it through the bar until it exits the end of the bar.

Now run the Wire through the outer port and out through the end of the bar. Both the guide housing and the wire should now exit the end of the bar together.

Loop wire end around and tape it end to end to the housing using your electrical tape.

With one hand, slowly pull the housing back out through the wire port at the center of the bar. With you other hand guide the wire so it doesnt kink or yank as you pull the guide housing, with wire attached, through the bar and out the center port.

Once the wire is through the center wire port you can undo the electrical tape and adjust the wire position to reach the computer at the stem. If you have excess wire, tuck it into either port as necessary.
STEP 2: BAR TO STEM
With Stem face plate removed, hold bar in place with one hand. With your other hand, install the face plates & top bolts. Tighten the top bolts to the stem body until there is no gap between the stem body and face plates. Thread lower bolts until bar is held in place, but can still roll easily.
STEP 3: SET BAR ROLL
Find the corresponding marking to your frame's headangle and line it up with the edge of the stem face plate. From hear adjust the bar roll to your preferred position.

STEP 4: TORQUE STEM BOLTS
Torque top stem bolts to 6Nm. Ensuring there is a gap at the bottom, tighten the lower stem bolts to 6Nm.


STEP 5: INSTALL E-CONTROL UNITS & PLUG IN
Install Computer right beside stem, torque to manufacturers spec. Install the Switch roughly beside the inside of the grip (you can adjust it once you have the brake positioned correctly. The wire can run underneath the switch clamp with a small amount of wire to make the loop back up to the switch plug in. Once both controls are set, plug both ends of your wire in with your TL-EW02 Di2 E-Tube Wiring Plug Tool. Test the function of your E-bike control units.

STEP 6: INSTALL CONTROLS & GRIPS
The Switch unit is usually placed right beside the grip. Install grip while paying attention to the wire. Make sure the wire fits nicely into the groove on the bar. torque the grip to the recommended torque spec (no higher than 5Nm). Install brake lever at your preferred position. Torque no higher than 5Nm.

STEP 6: FINAL ADJUSTMENT AND TORQUE CHECK
Now that all the controls and grips are installed, make your final adjustments to the controls. Double check the wire is tucked in nice with no excess hanging off the bar. Once complete, Check the torque spec on the bar and everything installed on it. Turn your E-bike on and test ride it.
Note: It is highly recommended to check the torque spec of your stem bolts & control bolts twice before shredding!
Congratulations!
You have successfully installed your E-Bar
If you are still having trouble please email us at support@oneupcomponents.com for help. Please include a detailed description of your issue, photos are often helpful.
Thanks
OneUp